Wednesday, October 31, 2012

This is Halloween Nail Art Challenge: Recreate

Happy Halloween!  Today is the last day of my first nail art challenge!  I made it through, and I am proud of myself for it.  I don't think I will be doing a Christmas challenge though, maybe in the spring I will take a chomp at one again.

Todays challenge is to recreate a look from another challenge, since this is my first challenge I dont have any to recreate.  So, I decided to do a crackle manicure!  I know, crackle is old news, but I have never used it before.  I am signed up for the Julep Maven monthly box and recently I recieved a Julep crackle by the name of "Sabrina".  I have not been able to use it during the challenge, so I decided to use it today!  I have never been that attracted to crackles, but I really like this one.  I used China Glaze "Stone Cold" as my base.  I used one coat because it is so opaque, which is great.  I then applied one coat of Julep "Sabrina" over it, and viola!

China Glaze "Stone Cold".  I really love it byitself too!

Crackle looks good!

I really tried to go for a clean manicure with this one.

Artsy shot!


Tuesday, October 30, 2012

This is Halloween Nail Art Challenge: Trick or Treat


How's everyone doing today?  It's the second to last challenge!  Today is "Trick or Treat."  For this challenge I did a different design on each nail, and used 19 different polishes!  I also used a Sally Hansen nail art pen in Black for the first time.  It definitely made things easier, but I did notice the black smudged off almost instantly.  This could be due to the lack of a top coat.  I did not apply one because I really did not want to mess up my hard work with black streaks.  I suppose I will do a test with the pen and top coat later on tonight when I am doing tomorrow's nail art.

On my right hand, A.K.A. the "Trick" hand, I did a spider on the thumb which connects to a web on the ring finger.  On my index finger I did an eyeball, on my middle finger I wrote "Trick", and on my pinky I did blood.  Originally on my pinky I did brains but they didn't turn out so well, and the black came off when I washed my hands.  Trust me the blood is much better!

I wanted to share a blurry shot because it really made the sparkly polish come out on the web finger.

My spider connecting with his web!  

The blood was actually the fastest and easiest thing to do, I just painted a free hand french tip and then used my dotting tool and drew some drops!


On my left hand, A.K.A. the "Treat" hand, I did a jack o lantern with my ring finger and thumb.  On my index finger I did a caramel apple, on my middle finger I wrote treat, and on my pinky I did a candy corn.  I am really happy with how the carmel apple and the jack o lantern came out.  You would think the candy corn would have been easy, but really it wasn't.  Taping is not my strongest suit, yet!

Jack o lanterns are way easier to draw when using the nail art pen!

Trick or Treat!

This is all of the polishes I used!  The most used to date!


This is my dog T.K.  I like to take my photos around 2:30 in the afternoon when the sun is just coming into our apartment.  Unfortunately TK loves to start his daily sunbathing around this time too!  Luckily he is a good dog and always moves to the side while I take my photos, and he gets right back to sun bathing when I am done!

If you have any questions about the polishes I used, let me know!  19 polish and brand names would take up a ton of space!


Monday, October 29, 2012

This is Halloween Nail Art Challenge: Graveyard

Hey everybody!  Before I get started, I want to say welcome to my 3 followers!  Thank you!  I hope you enjoy!  There are 3 more days until to Halloween, which means it's marathon time with the challenge!  For the next 3 days it is 3 different designs.  Bang, bang, bang!  I have enjoyed doing this challenge, but I think I am ready for it to be done.  I want to paint my nails something other than orange, black, purple, or green!  My birthday is coming up in 5 days, so maybe I will do a mini birthday challenge!  Candles one day, cake the next, streamers, who knows?

In the meantime, let's get back to the challenge at hand.  Graveyard!  I decided to do a gradient for this, and then paint tombstones and crosses over the gradient.  I know what you are thinking; "Kristina, you've done a gradient THREE times in this challenge!"  I honestly did not realize this until a few minutes ago when I was looking through my photos.  You would think I would be a pro at it, but I still am figuring it out.  Gradient is tough.  Hopefully I am getting better at it!  Ok, so I got side tracked again.  For this challenge I used 7 different polishes!  On the nails it only looks like 4.  I used the silver for the base, hoping that some shimmer would come out when I did the sponging.  Really I think I could have used the pale purple instead.  I had a lot of trial and error on a paper towel to get it right.  Actually I didn't feel like I had it right, I was just read to get going!  I finally narrowed it down to a swipe of Ulta "TuTu Cute", a swipe of Sally Hansen "Greige Gardens", and a swipe of NYC "Skin Tight Denim Creme".  Every now and then I threw some of the NYC "Tribeca Silver" into the mix.

Over all I would say it came out pretty good!  The only thing I noticed was the polish started to get really tacky and rough.  I am not sure exactly what the cause of this is, maybe too much sponging?  Either way I like what I got, and there is a bit of shimmer in there!


These are the 4 I used for the gradient.  Left to right:  Ulta "TuTu Cute" Sally Hansen "Greige Gardens" NYC "Skin Tight Denim Creme" and NYC "Tribeca Silver"
My Graveyard!  When I was sponging a piece of the sponge came off and suck into the polish.  I tried to retrieve it with tweezers, but it was too late.  Of course it happened on the finger I chose for the moon!  I can see it, can you?  Haha!

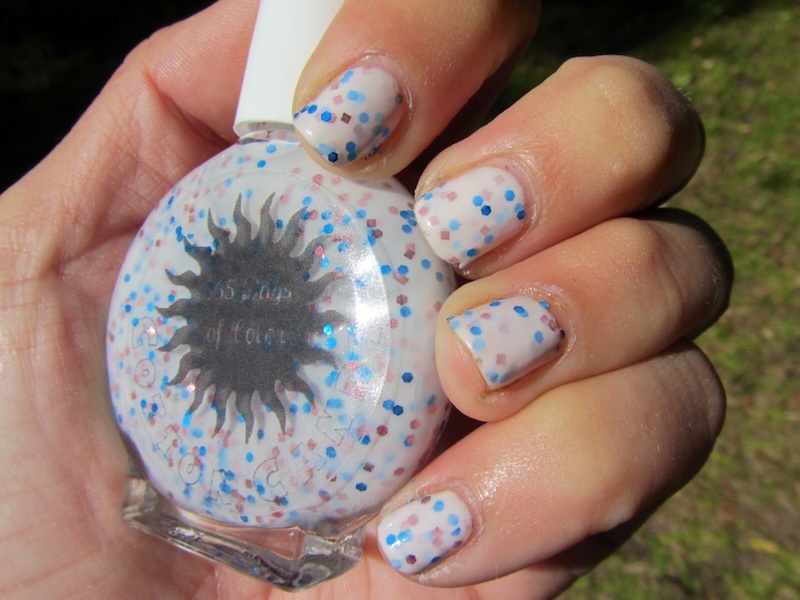
I really love this shot because it really captures the shimmer!  Especially on my index finger.  Sorry for the junk in the background, but I had to share this shot!


Friday, October 26, 2012

This is Halloween Challenge: Witches

The challenge today is witches.  I received my 2nd order from 365 Days of Polish the other day!  I got the Hocus Pocus mini collection, and today I am using "Boouk!" from that collection.  You can see the collection and many other great polishes here: 365 Days of Color  So I actually do not have any witches on my nails, but my polish is from a collection inspired by a movie about witches!  I love Hocus Pocus, and have seen it tons of times!  It is such a good, fun Halloween movie.

"Boouk!" is a unique glitter with a murky tannish base.  I would try it with a nude base.  I used L'Oreal "Walk on the Beach" for my base.  I had to use 3 coats to get it smooth looking.  After that I used 2 coats of "Boouk!"  Followed by a topcoat!  And this is what I got:

I love this!  If you look close you can see there is a shimmer in the base of this polish.

A nice break from all the orange, black, purple, and green, wouldn't you say?

Gorgeous! 

Tuesday, October 23, 2012

This is Halloween Nail Art Challenge: Gradient


As I continue my journey into the world of nail art I find myself learning new things all the time.  Most recently I have learned that I need to paint my nails the day before I post them to my blog.  For the last 3 parts of the challenge I have had my nails done on the right day, but have not been ready to post until the day after.  Yesterday I lost daylight and could not get the quality photos I wanted to get.  Lesson learned, plan better!  On to the polish!

Today I have the gradient part of the challenge.  I did four nails in the gradient and one as an accent nail.  On the accent nail I tried to mimic a frankenstein candle holder I got last year.  Free hand nail art is not my strong suit, but I think it came out pretty good!

I thought I would share the process with everyone!  I use a makeup sponge, polish, and paper towels.
As you can see there is a cup in the left of the photo.  I tried dipping the sponge in water to keep it from absorbing too much of the polish, but all that did was make a mess.


I tapped up my fingers to make clean up easier.  I just used 3 pieces of tape; one on top and two on the sides.

This is how it looked after I removed the tape.  A lot easier to clean up!


Finished product!  My frankenstein had a few issues as you can see, but I am really pleased with the gradient!


I used China Glaze "Gaga For Green" and Rimmel London "Black Satin"

I got this candle holder last year, and it was my inspiration for this challenge!


Friday, October 19, 2012

Back to This is Halloween Challenge: Bats!

Hi everyone!  Today I am back on the challenge!  I decided to do a gradient with OPI "I Brake for Manicures" and ULTA "Fine Pruned".  I then used Bundle Monster stamping plate BM13.  I am proud to say I think I had a break through with the photography!  I really like the way these photos came out this time.  I was actually laying on my stomach next to the door to my apartment balcony and the sun was just right.  I still want to work on perfecting the cleaning up process, but I think I am getting better. I really don't have much else to say, this was an easy and fun challenge today!  I will be back on Monday with the next one!  This is Halloween Nail Art Challenge

The gradient actually came out better in photos!  

This is my first time using my Bundle Monster plates.

I think they look pretty batty to me!


Wednesday, October 17, 2012

365 Days of Color: Cotton Candy

Hi!  Today I am being bad, or rather Monday I was bad, by not doing the "Zombies" part of the This is Halloween Nail Art Challenge  I couldn't decide what to do for it.  I am not good enough to draw a freehand zombie and I didn't want to just draw stitches on my nails.

So, luckily something else fell into my lap!  I recently placed an order with Sunny at 365 Days of Color  and received my order on Monday.  Because of a little mix up, I received some polishes I didn't order.  Sunny was great and told me the new ones would be coming and I could keep the others!  That is what I love about buying from these indie nail brands, they really take care of their customers.  I love it!  Today I am sharing what I got from 365 Days of Color.

I received a full size of Come Little Children, a full size of Cotton Candy, a mini of Explosion, and a mini of Glittercide.  Today I am wearing Cotton Candy.  It is a color I would have never ordered on my own, but now that I am weraring it I love it!  The application was great and I love how it looks.


365 Days of Color "Cotton Candy"


365 Days of Color "Cotton Candy"

365 Days of Color "Cotton Candy" 

This is an artsy shot!  Taken in my new light box, which I will have more on tomorrow!  


365 Days of Color "Glittercide" 
365 Days of Color "Explosion"
365 Days of Color "Come Little Children"  

Saturday, October 13, 2012

This is Halloween Challenge: Jack O' Lanterns

Hello to all!  As I have said I am new to the world of nail art and have been trying every polish and polish product I can get my hands on.  Unfortunately something I am using is not being good to my nails.  For the first time ever I am having issues with the tips of my nails peeling.  I have been cleaning up my excess polish using an angle brush dipped in pure acetone to clean up around my cuticles, and I am thinking that could be the cause of my weak nails.  I am bad at keeping up with the cuticle care, so I am going to make a real effort to do it routinely and see if that helps.  I don't know about giving up the pure acetone.  It just makes everything so easy!  I will do some more researching, and experimenting, and I will definitely share my results!  Now on to the challenge!

I just got back from vacation last night, so I am a day late, but I have the Jack O' Lanterns done!  I am really proud of the way they have turned out.  While on my trip I stopped at a Rite Aid and picked up some orange polish, so I don't have to mix my own again, and of course I got a few others.  One of the others I picked up is the purple I used for my design today.  It is "I Love You" by Sinful Colors.  For the faces I used Sinful Colors nail art polish in "Time Off".  I am really happy and proud of myself for how these Jack O' Lanterns turned out!  I also have to share my bargain find!  I bought another Sinful Colors polish named, "Serena And Chloe" and when the clerk scanned it the polish rang up for 0.49 cents!  Can you believe that?  Its my best bargain yet!

This is my right hand, I am a lefty so this is my better hand!

Right hand!  

This is polish before the faces.  I used Sinful Colors "I Love You"

Sinful Colors "I Love You"


Wednesday, October 10, 2012

This is Halloween Nail Art Challenge: Ghosts!

Hey!  Today I have photos for the Ghosts part of the challenge.  I had considered not doing it because I am currently on vacation in Gatlinburg, TN with the family.  I chose to suck it up and do it the night before we left.  The results are....eh, not that awesome.  Strangely enough I do not own a orange polish, so I had to mix my own with good old red and yellow.  I painted a glow in the dark polish on top which has a rough texture to it.  When I started the ghosts I was really tempted to draw cute penguins, but kept going with the ghosts.  Now I have cool glowing ghosts!  We will be returning on Friday and I hope to do the next part of the challenge then, possibly Saturday!

Saturday, October 6, 2012

First nail art challenge!

Hello to my readers!  Just kidding, I know this is more like a diary right now, but hopefully I will have readers one day! :)  I am doing my first nail art challenge, and I bet you can guess what kind it is.  Halloween!  Yay!  I chose to do the This is Halloween challenge from Lacquer Dreams.  I didn't find out about it until 2 days ago, so I missed the first day.  But I did do the water marble yesterday!  I spent around 5 hours figuring out my method.  It was my second time doing water marble, but first time with dark colors.  I originally tried black, purple, and orange, but I couldn't figure out the base coat.  Finally I got it down to the purple and the orange.  For the orange I used Wet n Wild Orange, and for the purple I used Ulta Femme Fatale.  By the time I was finished it was 9:00 PM and obviously the sun was down.  So I waited until today to photograph it.

I have a little side story I have to share with you.  My husband installs satellites and took me to work with him today because there is a Rite Aid in the town where he was going.  I have been wanting to see the pumpkin polishes I keep hearing about, but my drug stores don't carry them.  So I tagged along.  We went to the Rite Aid in the town where his job was but there selection was kinda sad.  I called it a bust, but he suggested going to another Rite Aid 16 miles away.  How sweet!  We drove to the other one and they did have more selection!  I also scouted around the other polishes just incase they had anything special.  I have been obsessed with a discontinued polish by L'Oreal called Owl's Night.  It is this awesome brown shimmery color, and the only place I can find it is on Ebay for around $16.00.  I am not paying that because....today I found it!!!!  In the second Rite Aid, I thought I would look at the names of the polishes just incase, and there it was!!!  Yippie!  So I got my Owl's Night along with a pumpkin polish and some others!  It was well worth riding along with my husband today!


This is my Halloween challenge water marble.  It looks more orange in person.

My other hand with the water marble!

This is the orange I used for this.  When I started the bottle was full.  Yeah.
This is Owl's Night!  Love it!!!


Thursday, October 4, 2012

Here We Go!


Hi there!  I have never had a blog before, so please bear with me as I figure this out.  My name is Kristina, I love nail polish and want to share my journey through the world of nail art with you.  I have always had a liking for nail polish, but didn't really get into the whole "nail art" thing until February of 2012.  I finally found my hobby!

My collection was contained in 2 cosmetic bags and quickly began to grow, until it was 3 overflowing cosmetic bags.  This is when I decided I needed a nail polish rack!  My husband agreed to help me and we built it together.  Pictures are below.  When I was thinking of building a rack I was constantly searching for photos of other peoples nail polish racks.  There were not many polish racks out there to look at.  This is what ignited the idea to start my own blog.  I want to share my experiences with other polish lovers out there.  My FB friends may "like" my polish rack, but they wont appreciate it like other polish lovers will!

I hope to use this blog as a way to document my progress through the world of nail art.  I can look back at photos from only 6 months ago and see a dramatic improvement in the quality of my work, and hope I can continue to grow.  More than anything I want to share my photos with other polish lovers.  There have been times when I have searched for a polish swatch online, only to find nothing.   I want to be able to take a photo and share it with anyone who is looking for that same color swatch.  I look forward to sharing my polishes, progress, and lessons learned with anyone who reads this!  Comments are very much welcomed!!!

This is the nail polish rack.  It was pretty simple to put together.  My husband and I went to the hardware store and bought some cheap wood, screws, and wood stain.  He put it together while I was at work one day, and I stained it!  It really was quite easy, and cost around $40.00.  My tip would be to give your self some room to grow, which I thought I did, but am not sure....

This is the rack finished.  I realize now that I did not document the building of it as well as I could have.  However, I could see myself outgrowing it within the next year or two, so I will make sure to do better next time!
This is a top down shot.  We put risers on each shelf so I could fit two rows of polish on each shelf.  The riser turned out to be a great idea, if I had not included it I would have quickly run out of room!